Auto approval/rejection configuration from Transaction Console
When crafting approval rules, there often arises a need to automatically approve or reject transactions under specific conditions. While setting up auto approval is relatively straightforward, configuring auto rejection within the transaction console can pose challenges. This blog aims to clarifies the steps needed to implement auto rejection functionality.

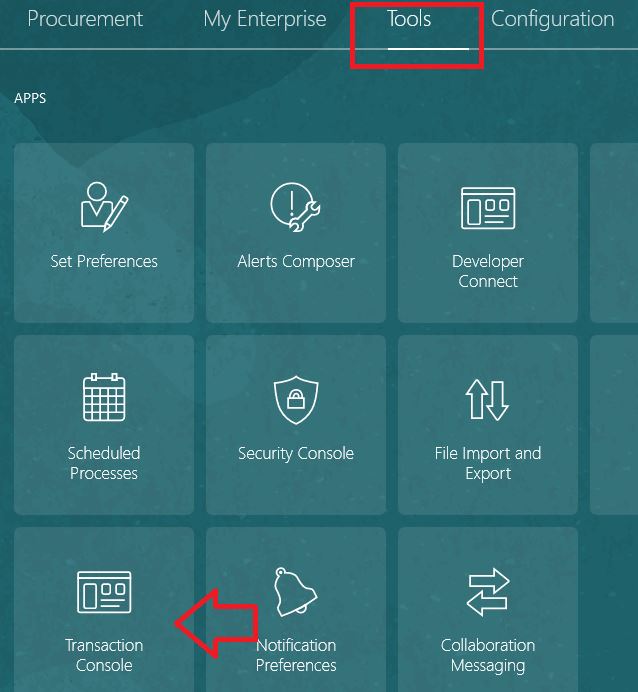
Navigate to Tools >> Transaction Console:
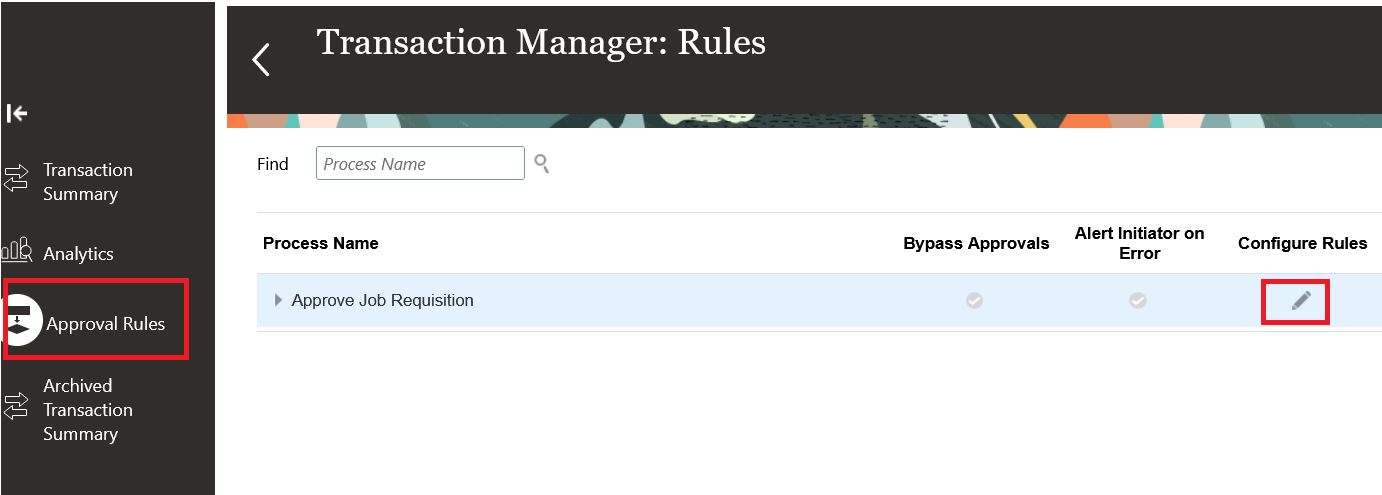
Navigate to the Approval Rules section and locate your business process.
As an illustration, let’s consider requisition approval, and we’ll demonstrate how to set up auto-rejection if the number of openings is not 1 and auto-approval if it equals 1.
Now add a rule and write your condition:
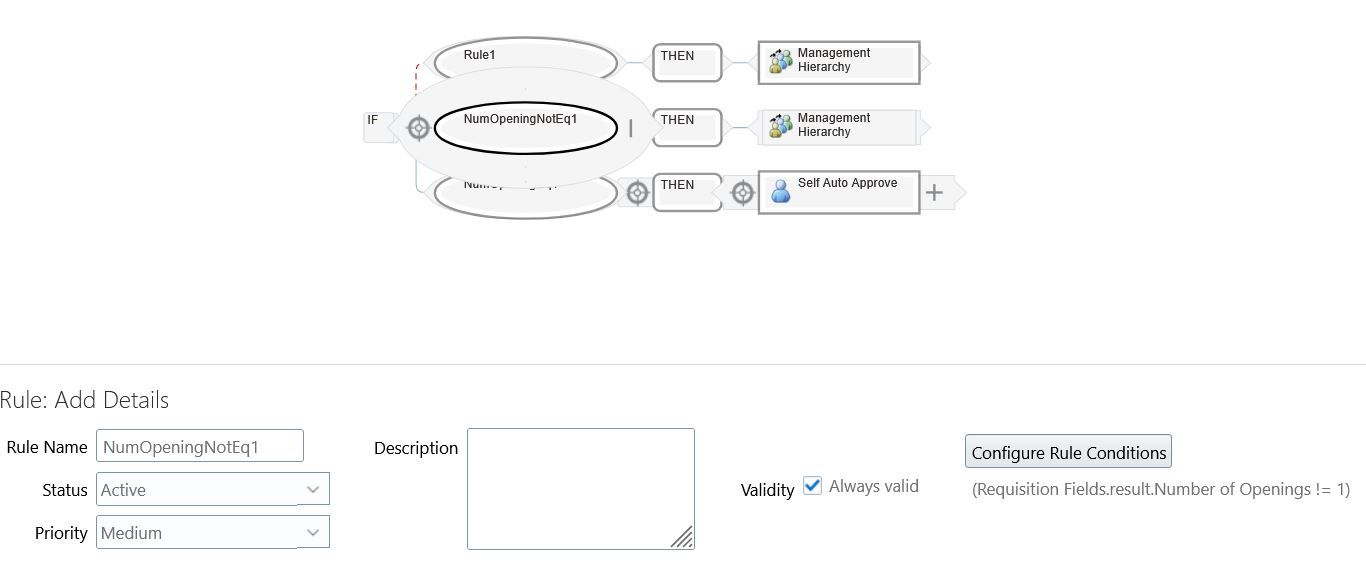
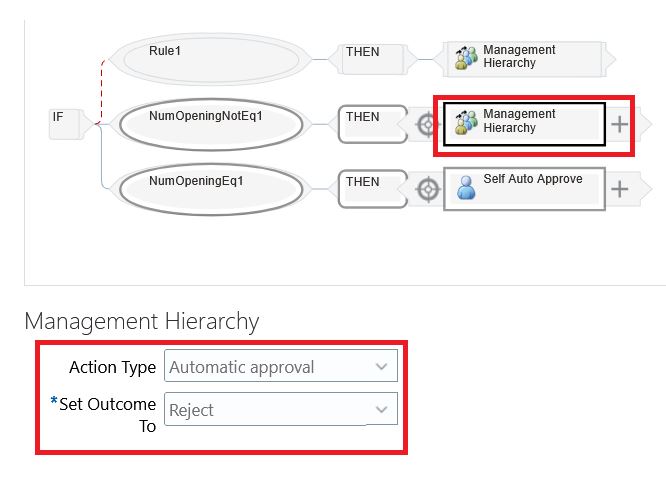
To add the reject condition – select “Management Hierarchy” and the select the Action Type as “Automatic approval” and set the outcome to “Reject”:
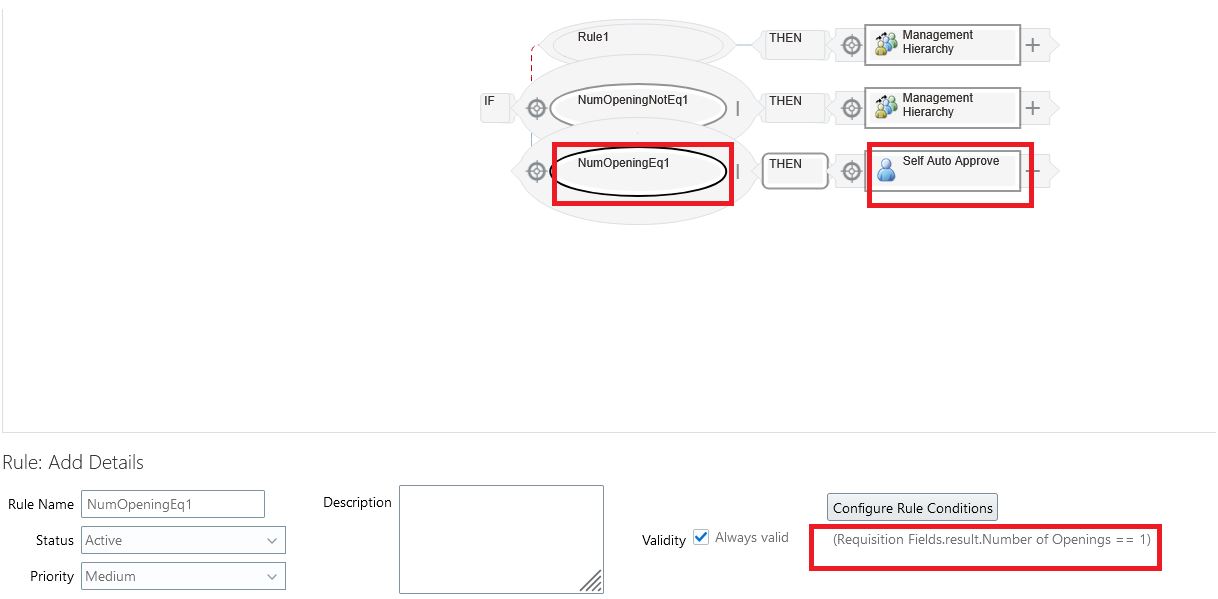
Similarly, write another rule of number of openings = 1 and simply select the “Self Auto Approve” from approvers list:
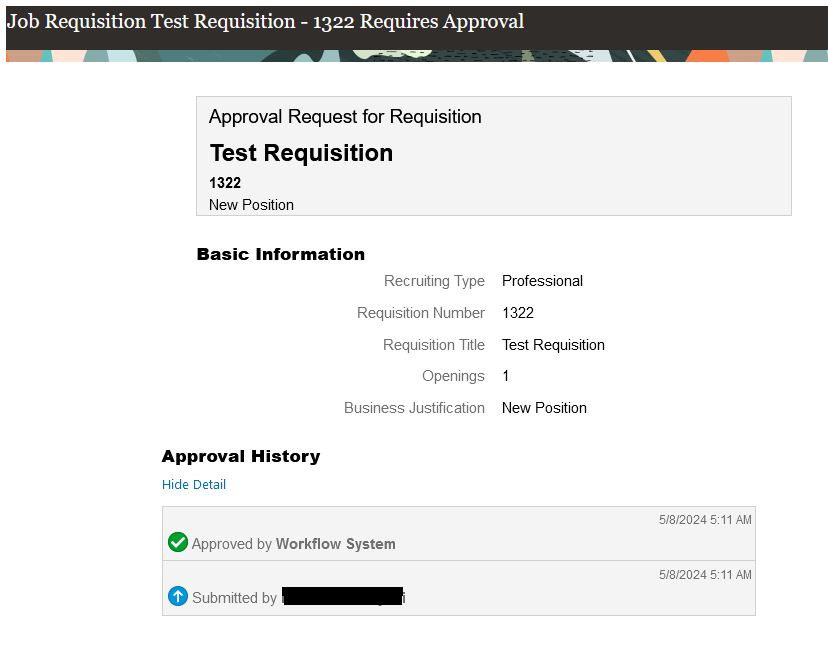
That’s it, the rules are ready. Save and submit them. Now let’s test it. I have created a requisition with number of openings as 2, and here is the auto-rejection from system:

Another test case where number of openings is set as 1 and the requisition is auto approved: