Candidate Feedback (Questionnaires using RMI)

Is your organization looking to capture candidate feedback during interviews or other phases of the recruitment process? This guide will help you understand how to configure an effective feedback system that enhances your recruitment strategy. By gathering insights from candidates at various touchpoints—whether during interviews, after assessment stages, or following job offers—you can refine your hiring processes, improve candidate experiences, and strengthen your employer brand. Let’s walk through the steps to set up a feedback system that benefits both your organization and your future talent pool.
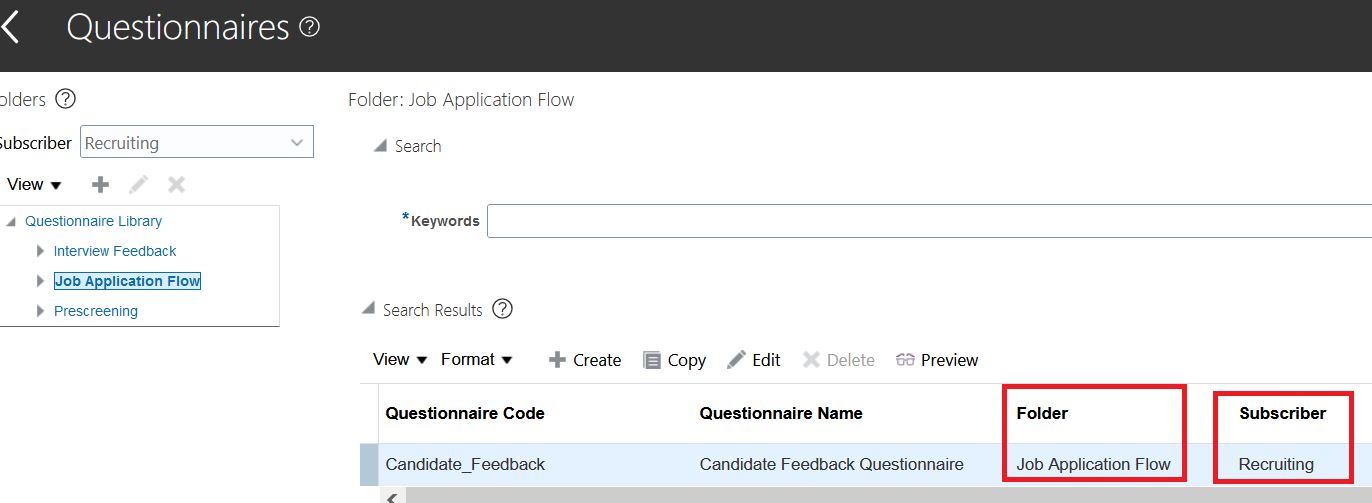
- Create a Questionnaire: The first step is to design a questionnaire under the subscriber “Recruiting” and folder “Job Application Flow.” This allows you to capture specific feedback at relevant stages of the recruitment process.
To create questions and build your questionnaire, follow this link to the guide on how to create questions and questionnaires.
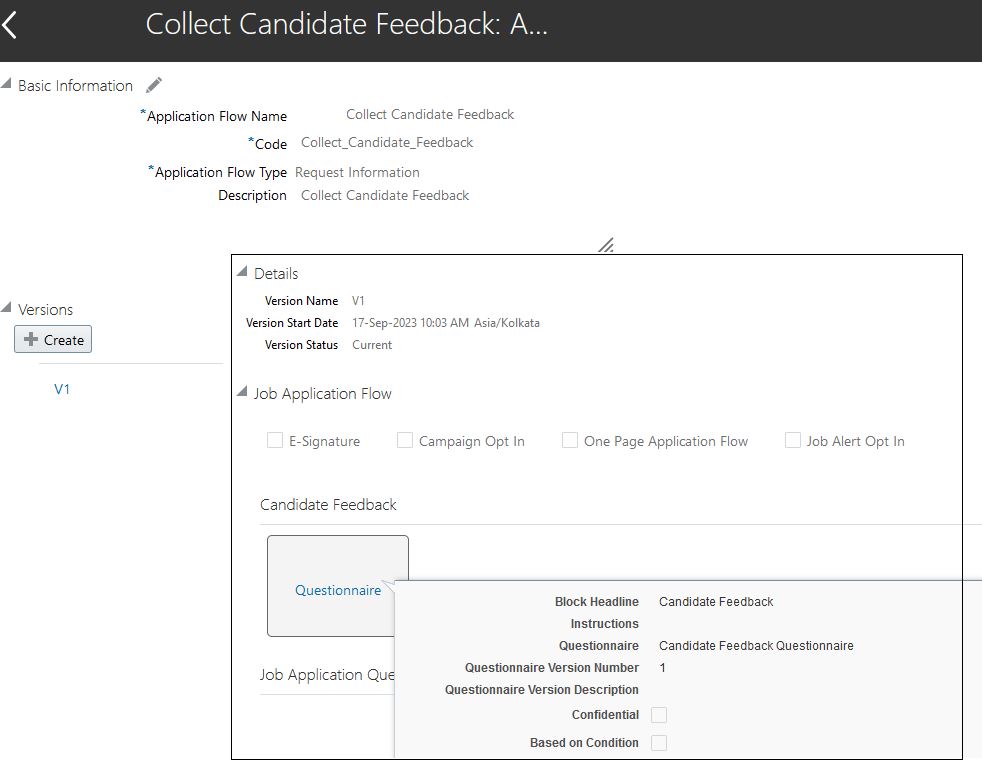
- Create a “Request Information” Flow (RMI): Now, you’ll need to set up a “Request Information” flow using the questionnaire you previously created. This flow will ensure that the feedback is sent to candidates at a specific phase and state of the recruitment process.
To do this, create the flow under the Job Application Flows task using “Application Flow Type” as “Request Information” and “Questionnaire” block:
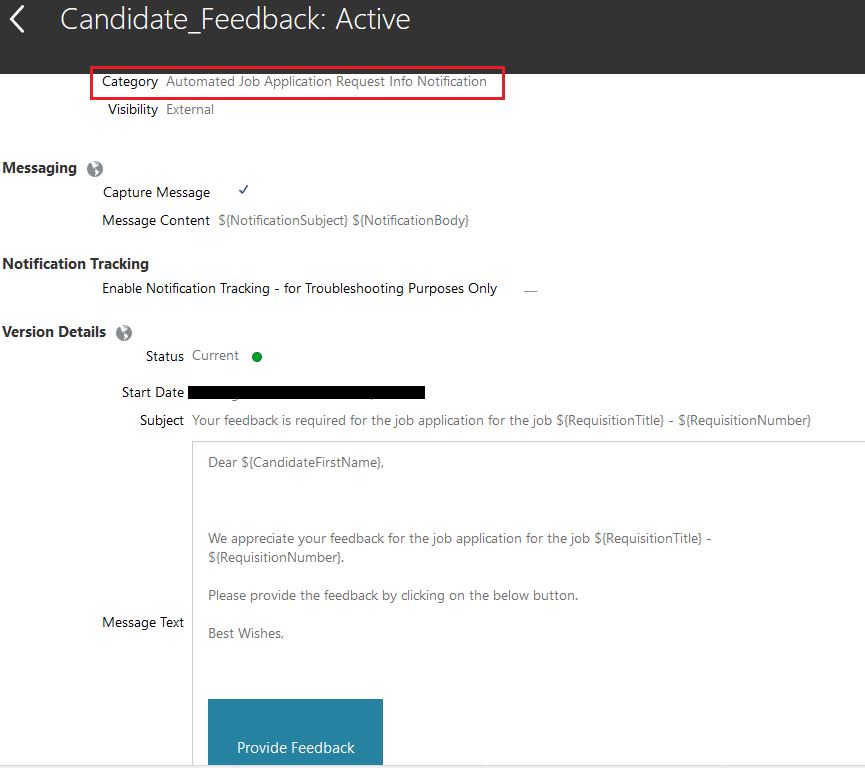
- Create a Notification: Next, you’ll need to set up a notification that will be automatically sent to candidates when the feedback form you created is shared with them. This notification will ensure candidates are informed and prompted to complete the feedback process.
To configure this, create the notification under the Recruiting Content Library task and place it under the Automated Job Application Request Info Notification category.
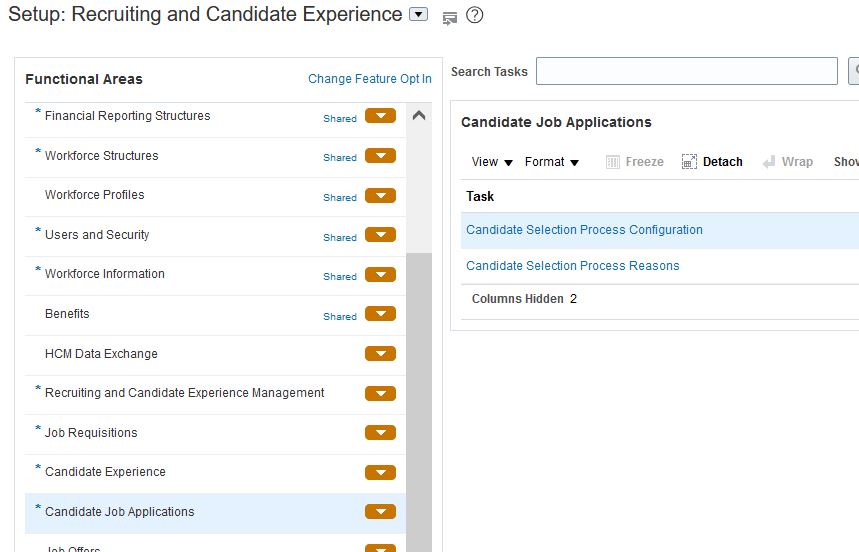
- Create an Action on “Candidate Selection Process”: The next step is to combine the “Request Information” (RMI) flow you created in step 2 with the notification from step 3. This action will trigger the flow and notification at the appropriate stage of the candidate selection process.
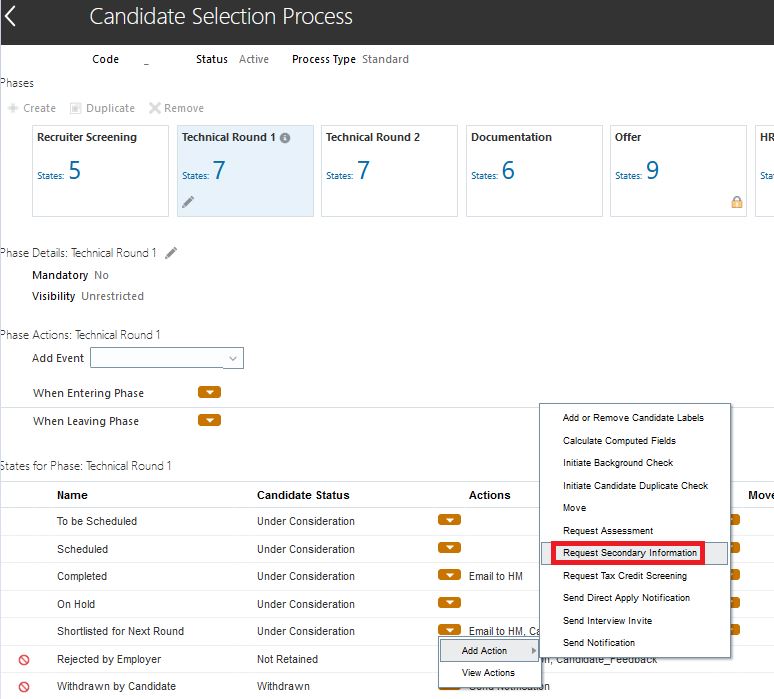
a. Navigate to “Candidate Selection Process Configuration” task and open an existing CSP to add the above action:
b. Click on the required phase and state within the candidate selection process where you want to send the feedback request. After selecting the appropriate phase and state, click on the “Add Action” and choose “Request Secondary Information” from the available action options.
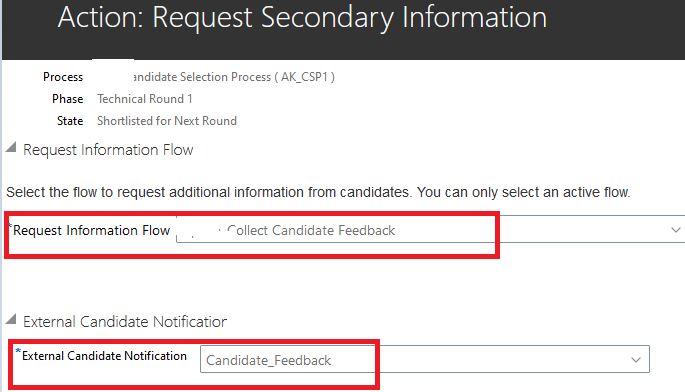
c. Select the “Request Information Flow” and notification:
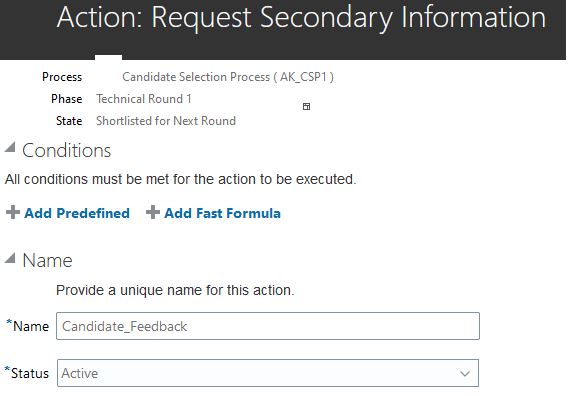
d. Click “Continue” to go to next screen, here, you can provide any additional conditions if needed (such as specific criteria or requirements for when and whom the feedback should be sent). You’ll also be prompted to give a name to this action for easier reference. Once you’ve filled out the necessary details, click “Save and Close” to finalize the action.:
- Testing the Setup: Now that the setup is complete, it’s time to test the process.
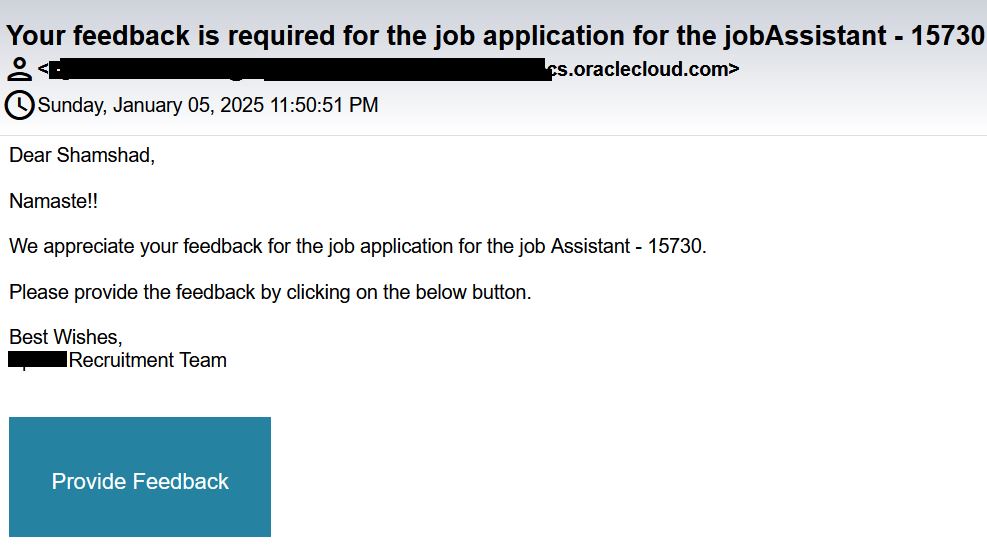
Move one of the job applications to the phase and state you selected earlier for sending the feedback. After that, wait for approximately 5 minutes to allow the system to run the processes. During this time, the candidate will receive the RMI (Request for Secondary Information) email, confirming that the feedback request has been triggered correctly.
Once the candidate receives the email, you can verify that everything is functioning as expected.

Few things to remember:
- Schedule ESS process “Perform Recruiting Candidate Selection Process Actions” every 5 minutes.
- Schedule ESS process “Send Job Application Notification” every 5 minutes.